

Introduction
Salmon rice balls, or “salmon onigiri,” are a delightful staple of Japanese cuisine. These triangle-shaped or round snacks are a perfect combination of umami-packed salmon and soft, slightly seasoned rice. Widely loved for their portability and versatility, they make for an excellent lunchbox item, a quick snack, or even a light meal.
The beauty of salmon rice balls lies in their simplicity and adaptability. Whether you prefer traditional fillings like grilled salmon or want to experiment with modern twists such as spicy mayo salmon or teriyaki-flavored fish, the possibilities are endless. Even beginners in the kitchen can master this recipe with just a few ingredients and some simple techniques.
Beyond their delicious taste, salmon rice balls are also highly nutritious. Packed with protein from the salmon and energy-rich carbohydrates from the rice, they provide a balanced and satisfying option for people on the go. Let’s dive into the list of ingredients you’ll need to make these delightful snacks.
Ingredients
Before making your salmon rice balls, gather these ingredients. This list includes both essentials and optional items to customize your onigiri to suit your preferences.
Essential Ingredients
- Rice:
- Use Japanese short-grain or medium-grain rice for the right texture. This rice becomes sticky when cooked, which is crucial for shaping the rice balls.
- Quantity: 2 cups of uncooked rice (makes about 4-6 rice balls).
- Salmon:
- Fresh or canned salmon can be used. Grilled, baked, or broiled salmon works best for traditional onigiri.
- Quantity: 1 fillet (about 150g) or 1 small can of salmon (drained).
- Nori (seaweed sheets):
- Optional for wrapping the rice balls to hold them together and add flavor.
- Salt:
- Used to season the rice and for a light coating to prevent sticking.
- Water:
- To wet your hands while shaping the rice balls, ensuring they don’t stick to your fingers.
Optional Ingredients for Variations
- Seasonings for Rice:
- Rice vinegar, sugar, and salt (for sushi rice).
- Furikake (Japanese rice seasoning) to mix into the rice.
- Additional Fillings:
- Spicy mayo salmon (mix salmon with mayonnaise and sriracha).
- Pickled plum (umeboshi) for a tangy twist.
- Cooked vegetables like edamame or sautéed mushrooms.
- Toppings and Garnishes:
- Sesame seeds (white or black).
- Chopped scallions or shiso leaves.
- Sauces for Drizzling:
- Soy sauce or teriyaki glaze for an extra umami kick.
With these ingredients ready, you’re all set to move to the fun part: making the rice balls.
Step-by-Step Instructions for Making Salmon Rice Balls
Creating salmon rice balls is a simple and enjoyable process. Follow these steps to ensure your onigiri turns out perfectly shaped, flavorful, and visually appealing.
Step 1 – Cooking the Rice
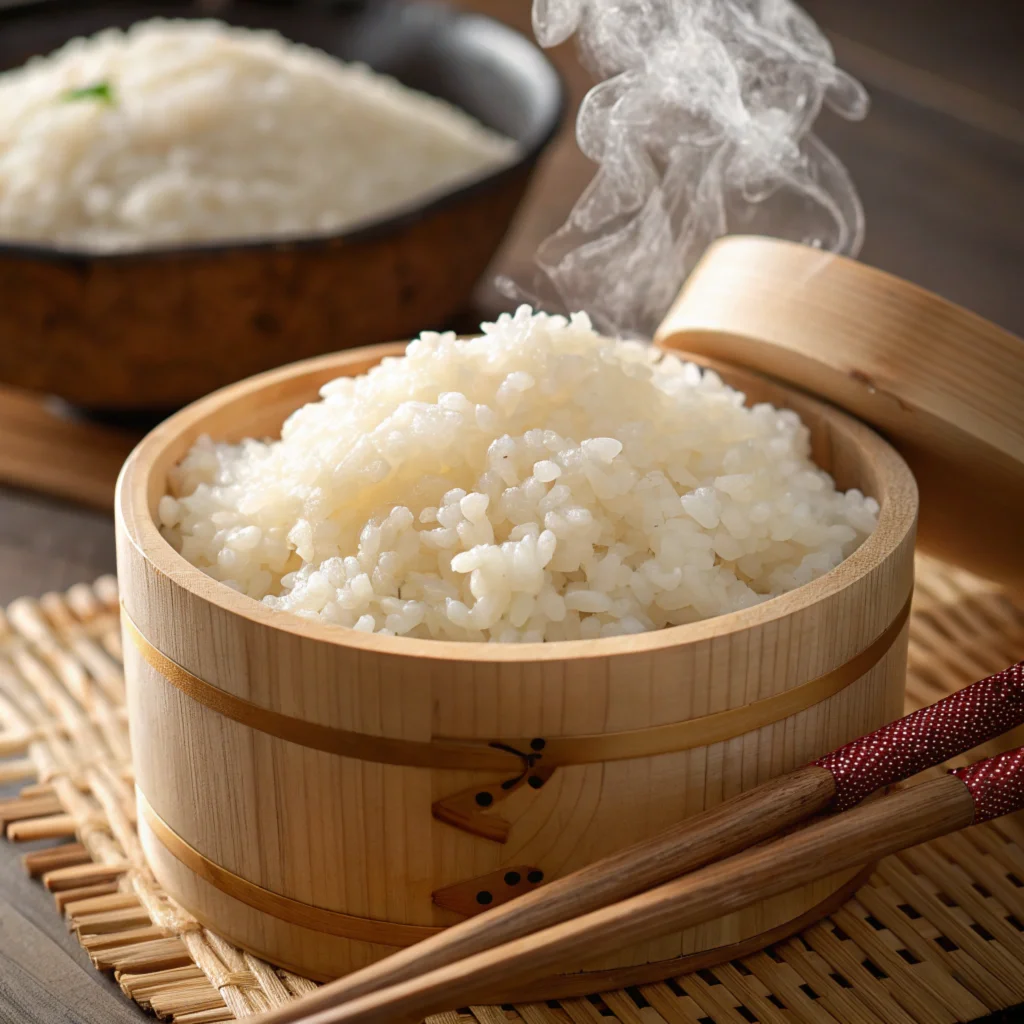
Wash the Rice:
Begin by rinsing 2 cups of Japanese short-grain or medium-grain rice in cold water. Use a fine-mesh sieve or a large bowl, washing repeatedly until the water runs clear. This step removes excess starch, ensuring your rice has the ideal texture for shaping.
Cook the Rice:
For consistent results, opt for a rice cooker. Alternatively, cook the rice on the stovetop. Add 2 ½ cups of water to the rinsed rice in a pot, cover, and simmer on low heat until the water is fully absorbed, which takes about 15-20 minutes.
Season the Rice (Optional):
If sushi-style rice is preferred, prepare a mixture of 3 tablespoons of rice vinegar, 1 tablespoon of sugar, and 1 teaspoon of salt. Gently fold this seasoning into the cooked rice while it’s still warm for a subtle tangy flavor.
Let the Rice Cool:
Transfer the cooked rice to a wide bowl to cool down to a manageable temperature. Shaping is much easier with warm rice that’s not too hot to handle.
Step 2 – Preparing the Salmon Filling
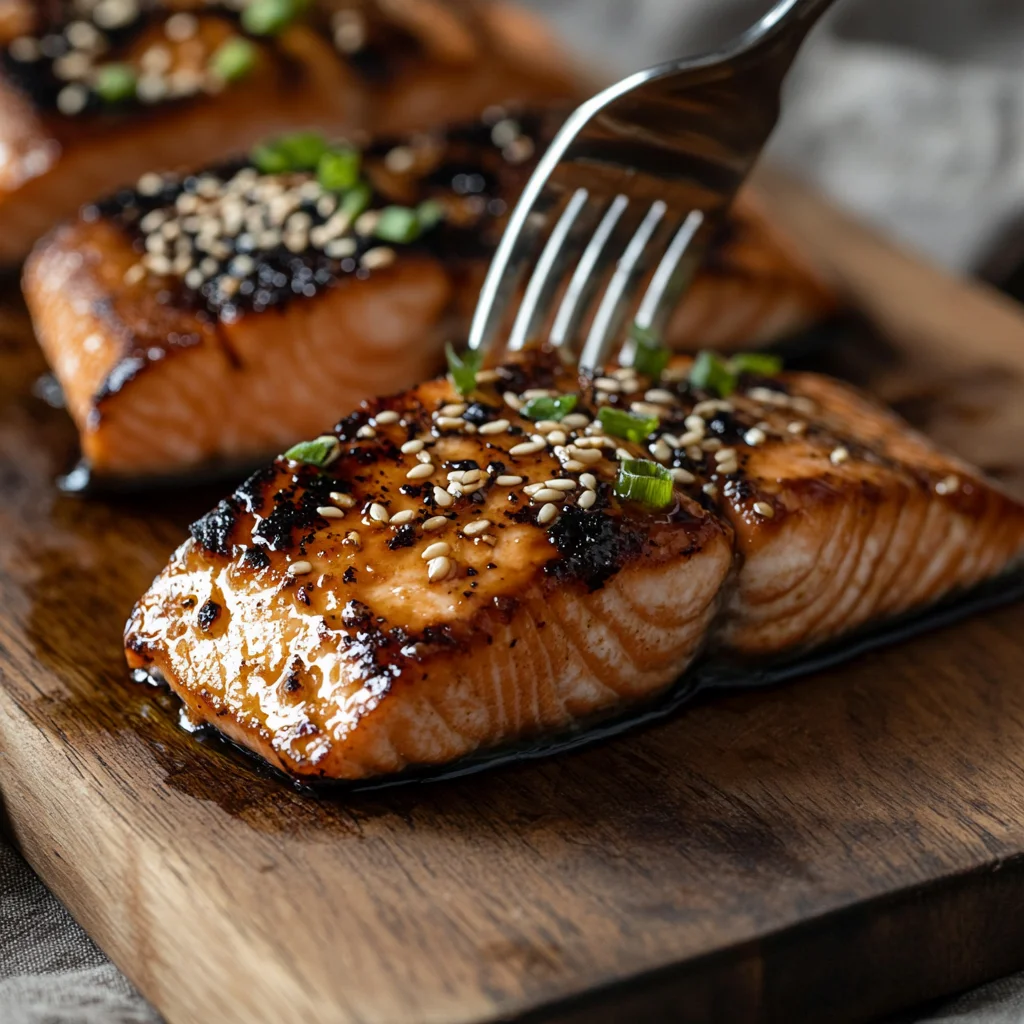
Cook the Salmon:
For fresh salmon, lightly season the fillet with salt and cook until it becomes flaky. Baking at 375°F (190°C) for 12-15 minutes, grilling, or pan-frying are all excellent options. Using canned salmon? Simply drain the liquid and proceed to the next step.
Shred and Season the Salmon:
Once cooked, shred the salmon into small, manageable pieces with a fork. Enhance its flavor with a pinch of soy sauce, a drizzle of sesame oil, or a dollop of spicy mayo if desired.
Set Aside:
Place the seasoned salmon filling in a bowl and keep it within easy reach. You’re now ready to assemble the rice balls.
Step 3 – Assembling the Rice Balls
Prepare Your Workspace:
Before shaping the onigiri, set up a bowl of water and a small dish of salt. Wet your hands to prevent the rice from sticking, and lightly coat your palms with salt to add flavor and keep things manageable.
Shape the Rice Balls:
Scoop about ½ cup of rice into your hand and flatten it gently into a disc. Add a teaspoon of shredded salmon filling in the center, ensuring it stays neatly contained.
Seal and Shape:
Bring the edges of the rice together to encase the salmon completely. Apply gentle pressure to form the rice into a triangle or round ball, avoiding excessive force that could crush the grains.
Wrap with Nori:
For added flavor and structure, wrap a strip of nori (seaweed) around the rice ball. This not only enhances the taste but also makes the onigiri easier to hold.
Repeat the Process:
Continue shaping rice balls until all the rice and salmon filling are used. Depending on size, you should end up with 4-6 rice balls.
Step 4 – Adding Finishing Touches
Optional Toppings:
Sprinkle sesame seeds, furikake, or chopped scallions over the rice balls for a decorative and flavorful finish. Shiso leaves also make a fantastic garnish for an authentic Japanese touch.
Serve Fresh:
For the best experience, enjoy the rice balls fresh at room temperature. If you’re planning to pack them for later, wrap each one tightly in plastic wrap to retain moisture and flavor.
With these steps, your delicious salmon rice balls are ready to serve or share!s classic Japanese treat!
Tips for Perfect Rice Balls
Making salmon rice balls is straightforward, but there are a few tricks to ensure they turn out delicious, perfectly shaped, and easy to handle. Follow these tips to elevate your onigiri-making skills!
Tip 1 – Use the Right Rice
The type of rice you use is crucial for successful onigiri. Stick with Japanese short-grain rice or medium-grain rice, as these have the right level of stickiness for shaping. Other types of rice, like long-grain or basmati, tend to fall apart because they lack the necessary starch content.
Additional Tips for Rice:
- Cook Consistently: Use a rice cooker for consistent results, or closely monitor stovetop cooking to avoid undercooked or mushy rice.
- Don’t Over-Mix: When seasoning or cooling the rice, fold it gently to maintain the structure of the grains and avoid making the rice gummy.
Tip 2 – Keep Your Hands Moist
Rice can stick to your hands, making it difficult to shape the balls. To prevent this:
- Dip Your Hands in Water: Before handling the rice, wet your hands with water.
- Add Salt: Lightly rub your palms with salt, which also seasons the rice balls while helping them retain moisture.
This method not only keeps your hands clean but also enhances the flavor of the rice.
Tip 3 – Don’t Overfill the Onigiri
The key to a well-shaped rice ball is balancing the amount of rice and filling. Using too much filling can make the rice ball fall apart. Stick to about 1 teaspoon of salmon filling per onigiri, or adjust based on the size of the rice portion.
Pro Shaping Tips:
- Flatten the rice in your hand evenly before adding the filling to avoid uneven distribution.
- When shaping, press gently but firmly to ensure the onigiri stays intact without squashing the rice grains.
Tip 4 – Use Fresh Ingredients
Freshness is vital for the best flavor and texture.
- Rice: Always use freshly cooked rice. Leftover rice loses its stickiness and becomes difficult to shape.
- Salmon: If using fresh salmon, cook it right before assembling the rice balls. If you’re using canned salmon, check the expiration date and taste to ensure it’s fresh.
Tip 5 – Wrapping and Storage
For Immediate Consumption:
- Serve the rice balls at room temperature shortly after making them. This is when they taste their best.
For Later Use:
- Wrap each rice ball tightly in plastic wrap or wax paper to keep it moist.
- Store in the refrigerator for up to 24 hours.
- When ready to eat, bring the rice balls to room temperature, or lightly reheat them in the microwave (without the nori) to restore their texture.
Tip 6 – Prevent Dryness in Nori
Nori can become soggy if it comes into contact with moist rice for an extended period. To keep the nori fresh and crisp:
- Wrap the rice balls in plastic wrap first and add the nori only when ready to serve.
- Alternatively, use specially designed onigiri wrappers with a separate nori compartment (widely available in Japanese stores).
Tip 7 – Experiment with Shapes
While the traditional shape for onigiri is a triangle, you can get creative:
- Round: Easier for beginners to shape.
- Cylindrical: Great for smaller bites or a modern twist.
- Molded Shapes: Use onigiri molds, available in fun designs like hearts or animals, to create themed rice balls for kids or special occasions.
Tip 8 – Pack Smart for Travel
If you’re packing salmon rice balls for a picnic, school lunch, or work snack:
- Use airtight containers to prevent them from drying out.
- Keep them cool with a small ice pack if stored for more than a couple of hours.
By following these tips, your salmon rice balls will be perfectly shaped, flavorful, and fresh every time.
Variations to Try
One of the best things about salmon rice balls is their versatility. While the classic combination of rice and salmon is delicious on its own, there are countless ways to customize onigiri to suit your tastes or dietary needs. Here are some creative and flavorful variations to try:
Variation 1 – Spicy Mayo Salmon
Add a zesty twist to your salmon rice balls with a spicy mayo filling. This variation is a favorite for those who love a bit of heat in their meals.
How to Make:
- Mix shredded cooked salmon with 2 tablespoons of mayonnaise and 1 teaspoon of sriracha (or adjust to your spice preference).
- Add a pinch of soy sauce or a drizzle of sesame oil for extra depth.
- Use this mixture as the filling when assembling your rice balls.
Pro Tip:
Sprinkle sesame seeds on the rice balls for added crunch and flavor.
Variation 2 – Teriyaki Salmon
For a sweet and savory option, teriyaki salmon rice balls are a fantastic choice.
How to Make:
- Cook salmon in a homemade or store-bought teriyaki sauce (a blend of soy sauce, mirin, and sugar).
- Shred the salmon and mix with extra sauce to intensify the flavor.
- Wrap the rice balls with nori and drizzle additional teriyaki sauce on top before serving.
Variation 3 – Vegan “Salmon” Rice Balls
For plant-based eaters, it’s easy to recreate the flavors of salmon rice balls without the fish.
How to Make:
- Use mashed roasted carrots, smoked tofu, or marinated jackfruit to mimic the texture of shredded salmon.
- Season with a mix of smoked paprika, soy sauce, and nori flakes to give a seafood-like taste.
- Fill your rice balls with this mixture and garnish with vegan-friendly toppings like sesame seeds or chopped scallions.
Variation 4 – Salmon and Cream Cheese
For a fusion twist, pair salmon with cream cheese for a flavor combination reminiscent of sushi rolls.
How to Make:
- Combine shredded cooked salmon with softened cream cheese.
- Add chopped green onions or capers for a touch of sharpness.
- Use this rich and creamy mixture as the filling for your rice balls.
Pro Tip:
This variation pairs wonderfully with cucumber slices or a sprinkle of dill on the side.
Heading 3: Variation 5 – Salmon and Pickled Plum (Umeboshi)
Add a tangy kick by combining the rich flavor of salmon with the sour-salty taste of umeboshi, a traditional Japanese pickled plum.
How to Make:
- Place a small piece of umeboshi in the center of the rice along with the salmon filling.
- The umeboshi’s acidity enhances the salmon’s umami flavor for a well-balanced snack.
Variation 6 – Furikake Rice with Salmon
Furikake, a Japanese rice seasoning, adds a burst of flavor and color to your rice balls.
How to Make:
- Mix furikake (available in flavors like sesame, seaweed, or bonito flakes) directly into the cooked rice.
- Shape the rice as usual, with or without a salmon filling, for a flavorful variation.
Pro Tip:
If you’re short on time, you can make plain rice balls with furikake seasoning and serve salmon on the side as a dip.
Variation 7 – Salmon and Edamame
For a nutrient-packed variation, add cooked edamame beans to the rice mixture.
How to Make:
- Lightly salt and shell cooked edamame beans.
- Mix the beans into the cooked rice before shaping the rice balls.
- Add shredded salmon as the filling or mix it directly into the rice for an even distribution.
Variation 8 – Smoked Salmon Onigiri
For a luxurious touch, use smoked salmon instead of cooked salmon.
How to Make:
- Use thin slices of smoked salmon as the filling.
- Wrap the rice balls in nori, or use the smoked salmon to wrap the entire rice ball for a gourmet presentation.
Pro Tip:
This variation works beautifully with a dollop of crème fraîche or a sprinkle of dill.
Experiment with Shapes and Sizes
Beyond fillings and flavors, you can also experiment with different shapes and sizes to customize your rice balls. Mini onigiri are great for kids or party platters, while jumbo-sized rice balls can serve as a complete meal.
With these variations, you can transform the humble salmon rice ball into a personalized culinary creation.
Dipping Sauces and Condiments
While traditional onigiri doesn’t typically require condiments, you can serve dipping sauces on the side for added flavor:
- Soy Sauce: For a classic touch, lightly dip the rice ball into soy sauce before taking a bite.
- Wasabi Mayo: A blend of mayonnaise and wasabi adds a creamy, spicy kick.
- Ponzu Sauce: The citrusy tang of ponzu enhances the salmon’s flavor without overwhelming it.
- Pickled Ginger: A small side of pickled ginger acts as a palate cleanser and adds a refreshing zing.
Drinks to Pair with Salmon Rice Balls
1. Green Tea
- The earthy and slightly bitter notes of green tea complement the flavors of the rice and salmon.
- Serve it hot for a soothing effect or iced for a refreshing contrast.
2. Sake (Rice Wine)
- If you’re serving salmon rice balls as part of a more sophisticated meal, pair them with sake.
- Opt for light, slightly fruity sakes to balance the savory flavors.
3. Iced Barley Tea (Mugicha)
- This caffeine-free Japanese tea has a nutty and roasted flavor that pairs wonderfully with the soft and savory rice balls.
4. Sparkling Water with Citrus
- A simple glass of sparkling water with a slice of lemon or yuzu provides a clean, refreshing drink that doesn’t compete with the flavors of the onigiri.
Meal Ideas Featuring Salmon Rice Balls
1. Bento Box
- Pack salmon rice balls alongside sliced fruits, vegetables, tamagoyaki, and a small serving of pickles for a balanced bento box meal.
2. Picnic Spread
- Serve salmon rice balls with an assortment of Japanese snacks like rice crackers, seaweed chips, and mochi for a delightful outdoor meal.
3. Japanese Breakfast
- Include salmon rice balls in a traditional Japanese breakfast spread with grilled fish, miso soup, and steamed vegetables.
Dessert Pairings
After enjoying the savory flavors of salmon rice balls, consider a light and sweet dessert to round out the meal:
- Mochi Ice Cream: The chewy mochi exterior and creamy interior make this a perfect post-meal treat.
- Dorayaki: These pancake-like desserts filled with sweet red bean paste are a classic Japanese choice.
- Fresh Fruits: Serve sliced oranges, strawberries, or persimmons for a simple and refreshing dessert.
By pairing salmon rice balls with these sides, condiments, and beverages, you can create a well-rounded and memorable dining experience.
Frequently Asked Questions (FAQs)
Salmon rice balls are simple to prepare, but you may have some questions about the process, ingredients, or storage. Here are answers to the most common queries to help you master this recipe.
FAQ 1 – Can I use leftover rice for making salmon rice balls?
It’s best to use freshly cooked rice for making onigiri. Fresh rice is warm and sticky, making it easier to shape into balls or triangles. Leftover rice tends to lose its stickiness, which can make it crumble when shaped.
Pro Tip:
If you must use leftover rice, reheat it with a little water in the microwave to restore some of its moisture and texture.
FAQ 2 – What type of salmon works best for rice balls?
Both fresh and canned salmon work well, depending on your preference and convenience.
- Fresh Salmon: Grilled, baked, or broiled salmon offers a richer, more authentic flavor.
- Canned Salmon: A convenient option that’s easy to season and use, especially for quick preparation.
Pro Tip:
If using fresh salmon, lightly salt the fillet before cooking to enhance its flavor.
FAQ 3 – Can I freeze salmon rice balls?
Yes, salmon rice balls can be frozen for later use. Wrap each rice ball tightly in plastic wrap and place them in an airtight freezer bag.
Freezing and Reheating Tips:
- Freeze for up to 1 month for best quality.
- Reheat in the microwave (without the nori) by wrapping the rice ball in a damp paper towel to retain moisture. Add nori after reheating for freshness.
FAQ 4 – How do I keep salmon rice balls fresh for a picnic or lunchbox?
To keep your rice balls fresh:
- Wrap them tightly in plastic wrap to prevent drying out.
- Store them in an airtight container.
- Use an ice pack if they’ll be stored for more than 2 hours.
Nori Tip:
For the crispiest texture, pack the nori separately and wrap the rice balls just before eating.
FAQ 5 – Can I use a rice mold to shape onigiri?
Yes, rice molds are a great tool for beginners or anyone looking to save time. They ensure uniform shapes and sizes, making your rice balls look professional and consistent.
Where to Buy:
You can find onigiri molds in Japanese grocery stores or online. They come in various shapes, including triangles, hearts, and even animal designs.
FAQ 6 – What other fillings can I use besides salmon?
Salmon is a classic filling, but there are many other delicious options:
- Traditional Japanese Fillings: Pickled plum (umeboshi), bonito flakes with soy sauce, or miso-marinated vegetables.
- Modern Fillings: Spicy tuna, teriyaki chicken, or scrambled eggs with cheese.
- Vegan Options: Roasted vegetables, marinated tofu, or mashed avocado with a hint of lime.
Experiment with these fillings to discover your favorite combinations!
FAQ 7 – Why does my rice ball fall apart?
If your rice ball crumbles or falls apart, it may be due to:
- Improper Rice Type: Make sure to use Japanese short-grain or medium-grain rice for the required stickiness.
- Dry Rice: Avoid using rice that’s too dry or has been refrigerated for a long time.
- Under-Shaping: Press the rice gently but firmly when forming the ball to ensure it holds together.
FAQ 8 – Are salmon rice balls healthy?
Yes, salmon rice balls are a nutritious snack or meal. They’re packed with protein from the salmon, healthy carbs from the rice, and beneficial minerals from the seaweed.
Nutritional Highlights:
- High in Omega-3 fatty acids (from salmon).
- A good source of energy (from rice).
- Low in fat, especially if baked or grilled salmon is used.
For a lighter version, skip the mayo-based fillings and opt for plain or lightly seasoned salmon.
With these answers, you’re equipped to handle any challenge or question about making salmon rice balls.
Master the Art of Salmon Rice Balls: A Delightful Treat for Any Occasion
If you’re diving into the delicious world of Japanese cuisine, our Salmon Rice Ball Recipe is the perfect way to start. Complement your salmon rice balls with other tantalizing seafood ideas like the Salmon and Sweet Potato Recipe for a nutritious side, or explore the rich, creamy indulgence of the 10-Minute Salmon Alfredo Recipe for a complete meal pairing. Additionally, don’t miss the versatile Salmon Egg Recipe for a breakfast twist. These recipes ensure your kitchen is brimming with flavor, offering unique ways to elevate your salmon rice ball creations.
Conclusion
Salmon rice balls, or salmon onigiri, are a perfect blend of simplicity, nutrition, and versatility. From their humble beginnings as a staple in Japanese cuisine, they have become a global favorite, loved for their portability, ease of preparation, and the endless possibilities they offer for customization.
By following this comprehensive guide, you’ve learned how to cook the rice, prepare the salmon filling, and assemble rice balls with precision. Whether you choose the traditional route or experiment with creative variations like spicy mayo salmon or vegan options, salmon rice balls are sure to become a go-to recipe in your kitchen.
Not only are they delicious, but they’re also packed with nutrients, offering a balanced snack or meal that fits into busy lifestyles. Pair them with classic sides like miso soup or seaweed salad, and you have a meal that’s as satisfying as it is wholesome.
Now that you’ve mastered the art of making salmon rice balls, it’s time to roll up your sleeves and create your own! Share this recipe with friends and family, and enjoy the joy of crafting these tasty, handheld delights. Happy cooking!